 Welcome back to our Linux Terminal series! In our previous articles, we’ve explored navigating the file system, manipulating files and directories, and processing text. Now, we’re diving into a crucial aspect of Linux system administration and security: file permissions.
Imagine you’re working on a shared server with your team. You have sensitive project files that only certain team members should be able to modify. At the same time, there are resources that everyone needs to access. How do you ensure that the right people have the right access to the right files? This is where Linux file permissions come into play.
Understanding and managing file permissions is essential for:
- Maintaining the security of your system
- Protecting sensitive data
- Enabling collaboration while preserving privacy
- Preventing accidental modifications or deletions
In this article, we’ll explore the ins and outs of Linux file permissions, from basic concepts to advanced techniques. By the end, you’ll have the knowledge to effectively manage access to files and directories in a Linux environment.
Setting Up Our Workspace
Before we dive into the concepts and commands, let’s set up a workspace where we can practice safely. This will ensure we’re all starting from the same point and can follow along with the examples.
-
Open your terminal.
-
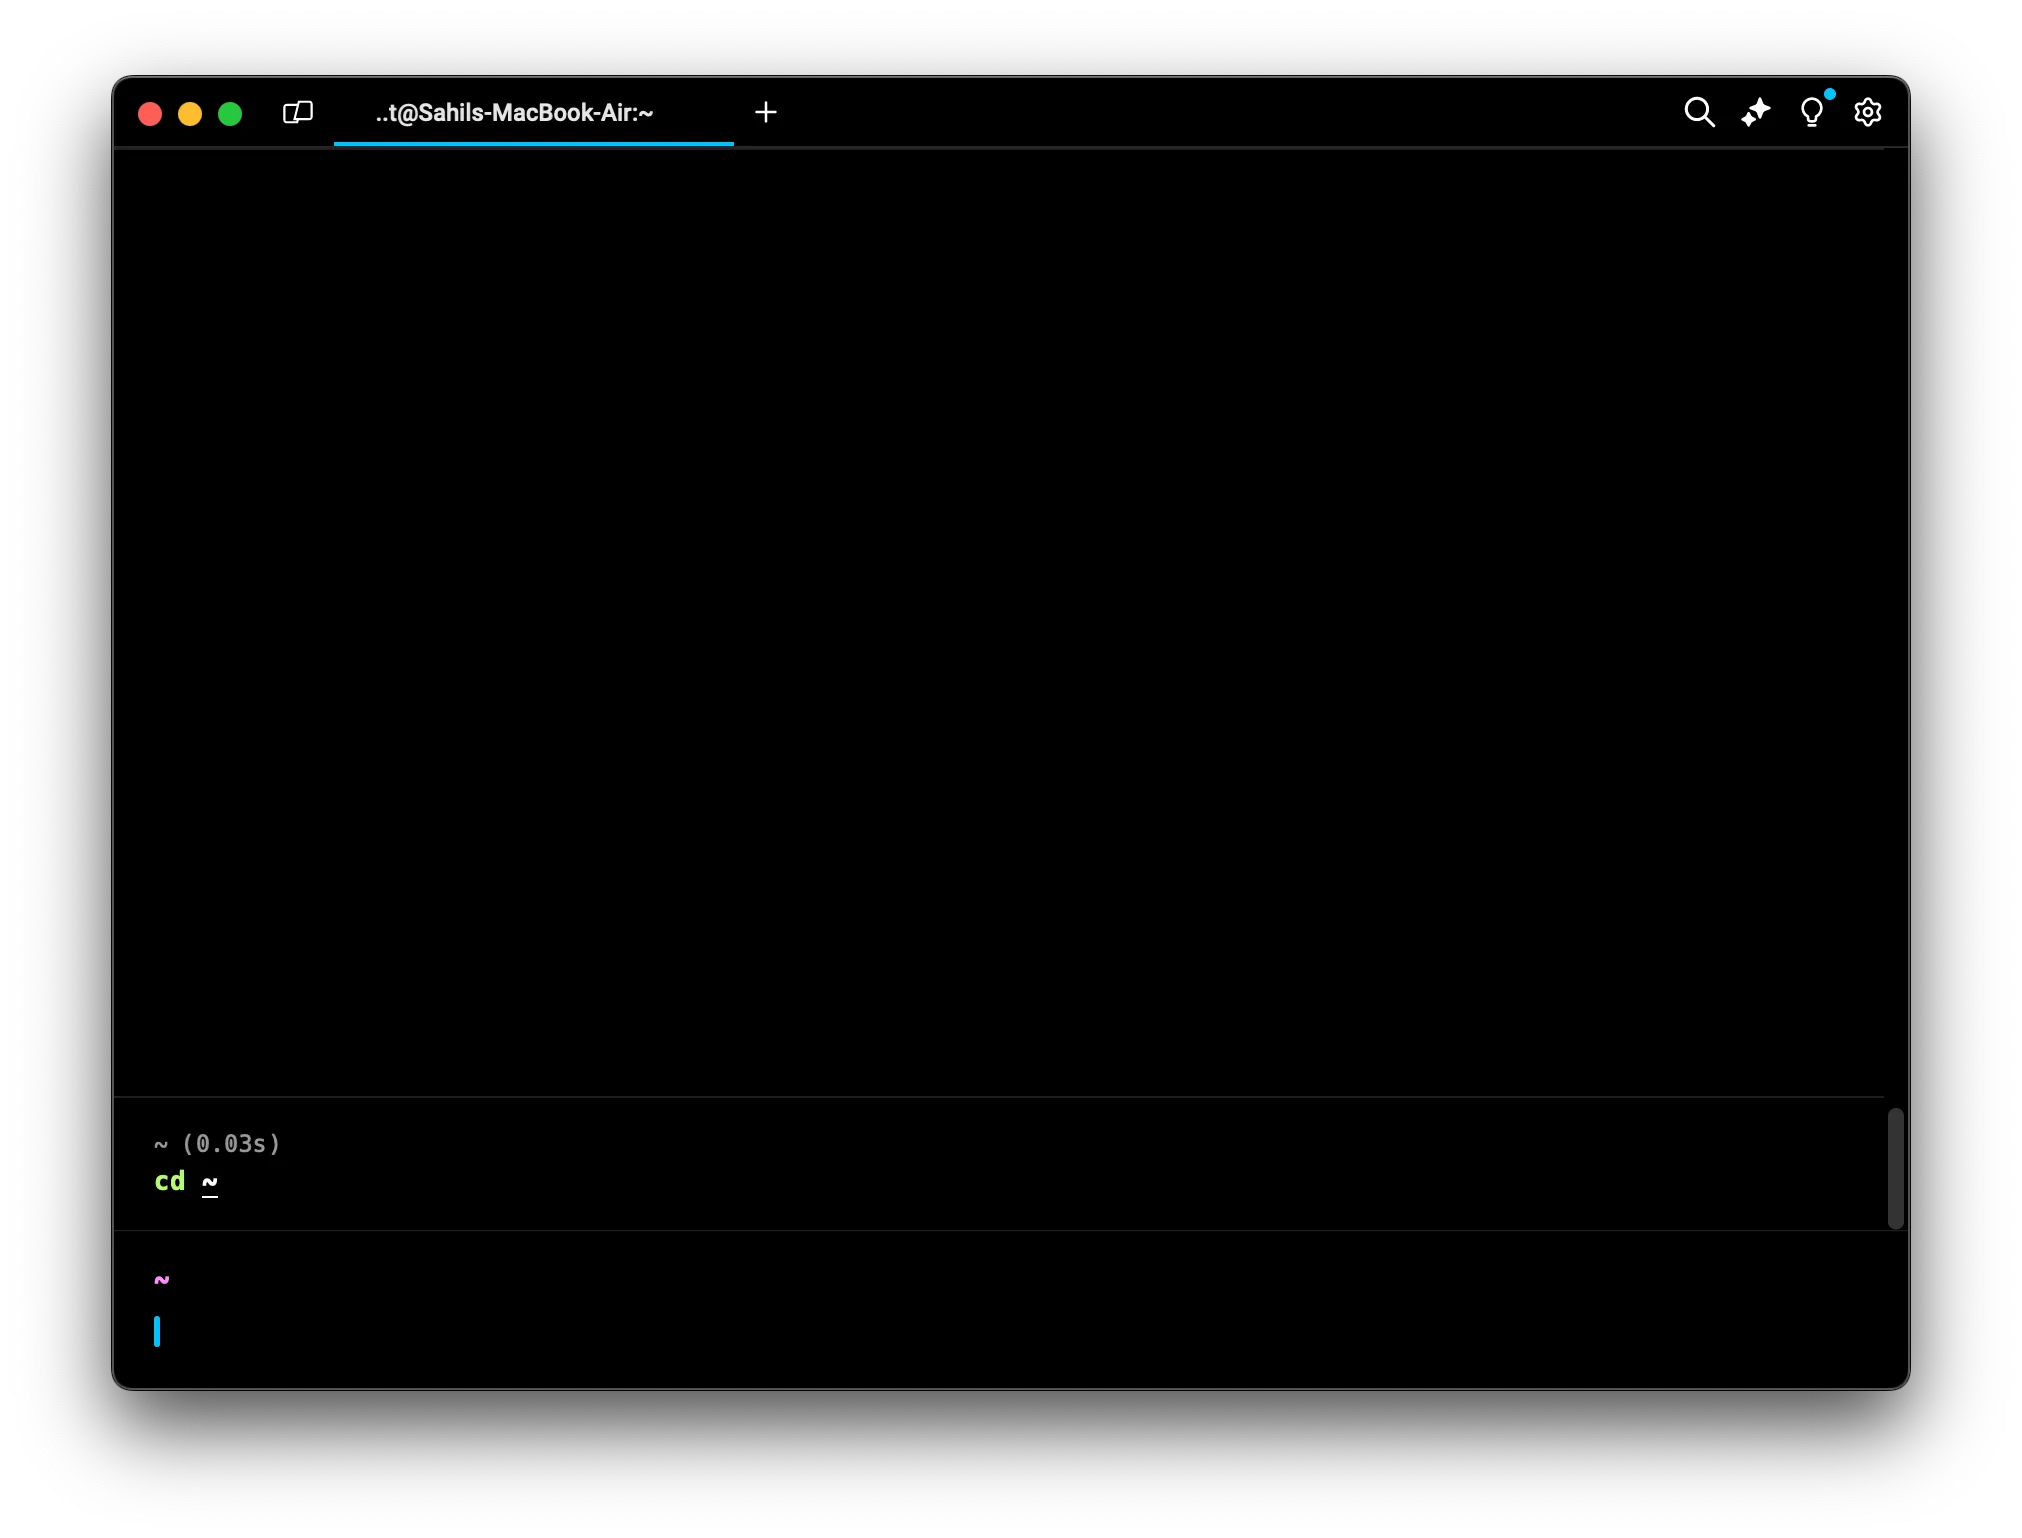
Navigate to your home directory:
cd ~
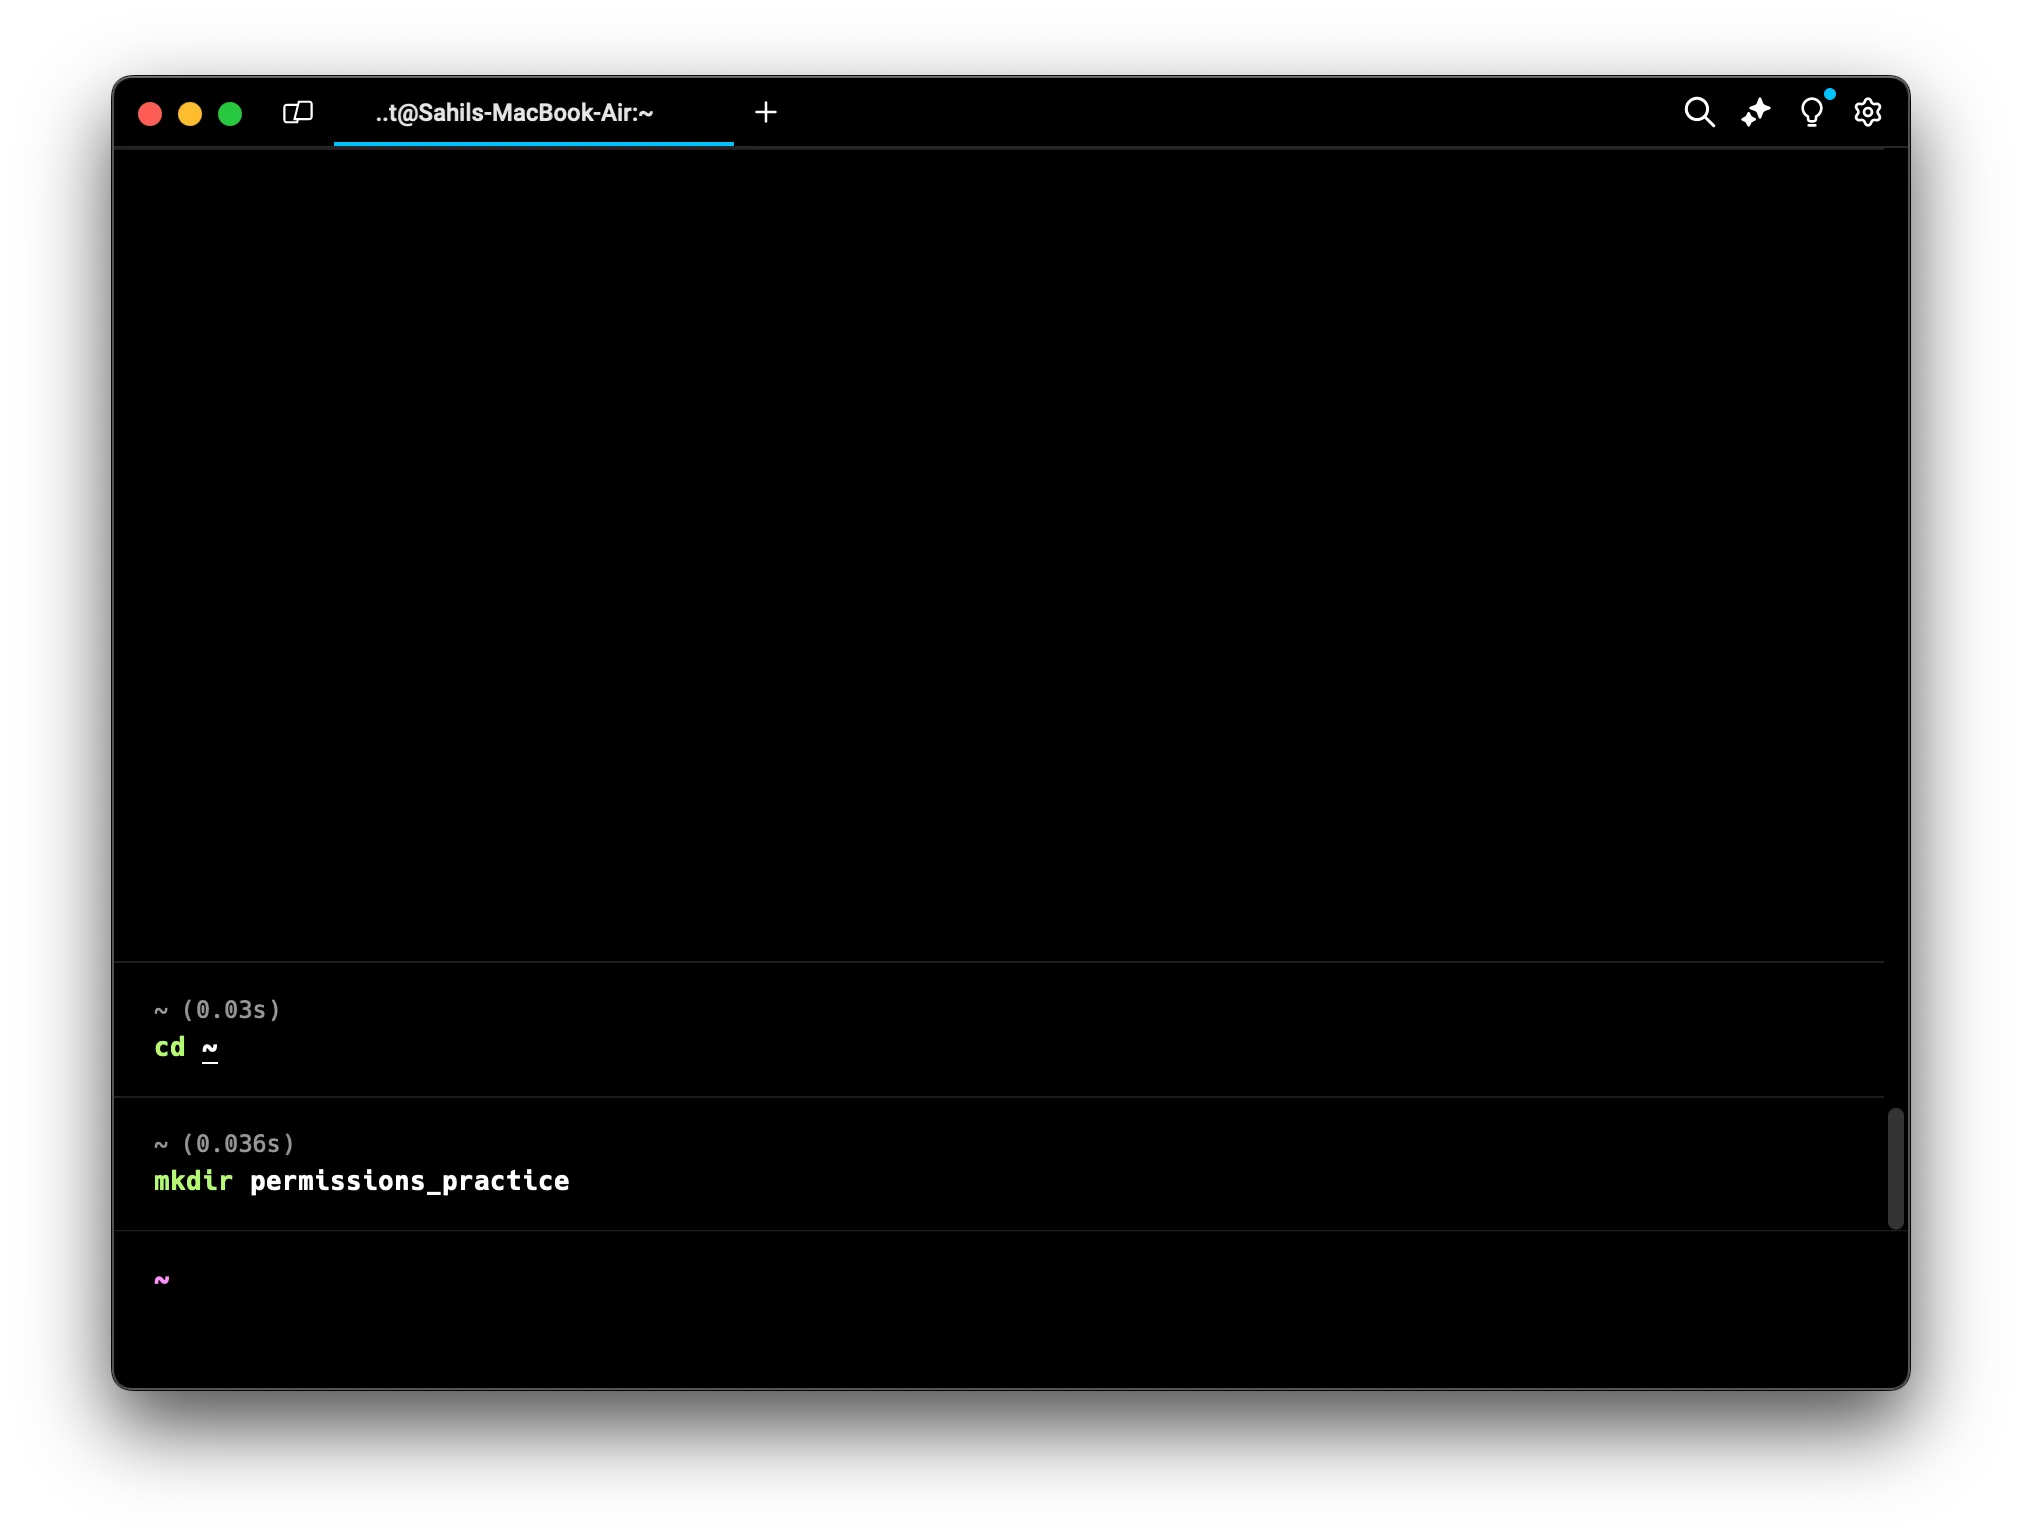
 3. Create a new directory for our permissions practice:
mkdir permissions_practice
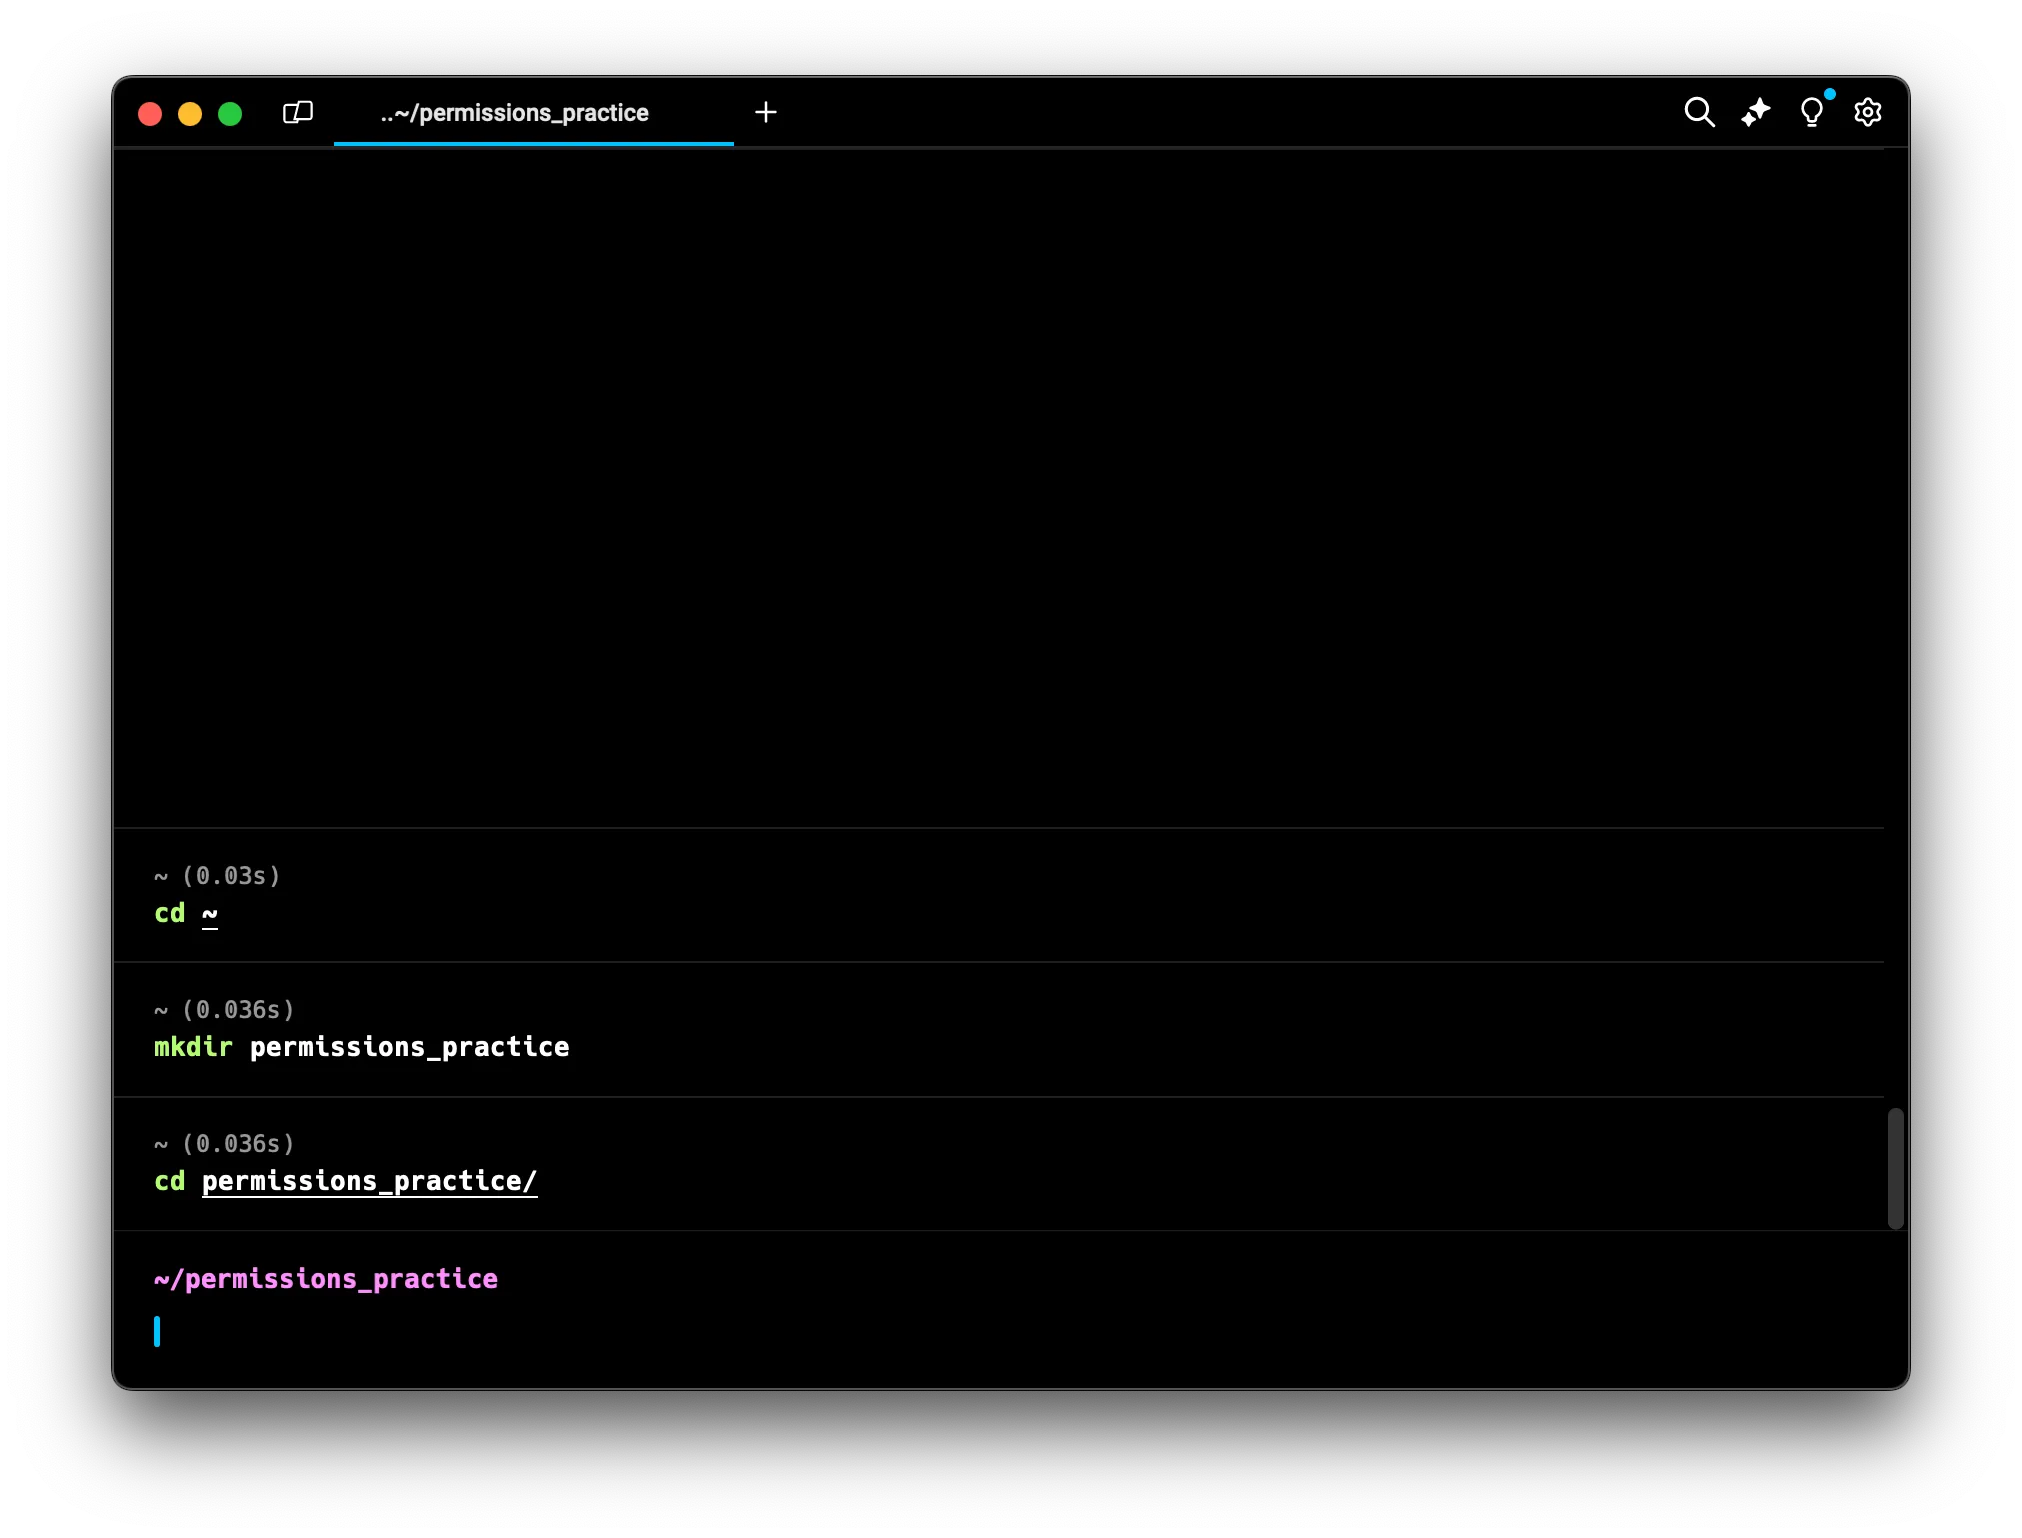
 4. Move into this new directory:
cd permissions_practice
 5. Let’s create some files and directories to work with:
touch file1.txt file2.txt
mkdir dir1 dir2
echo "Secret info" > secret.txt
ls
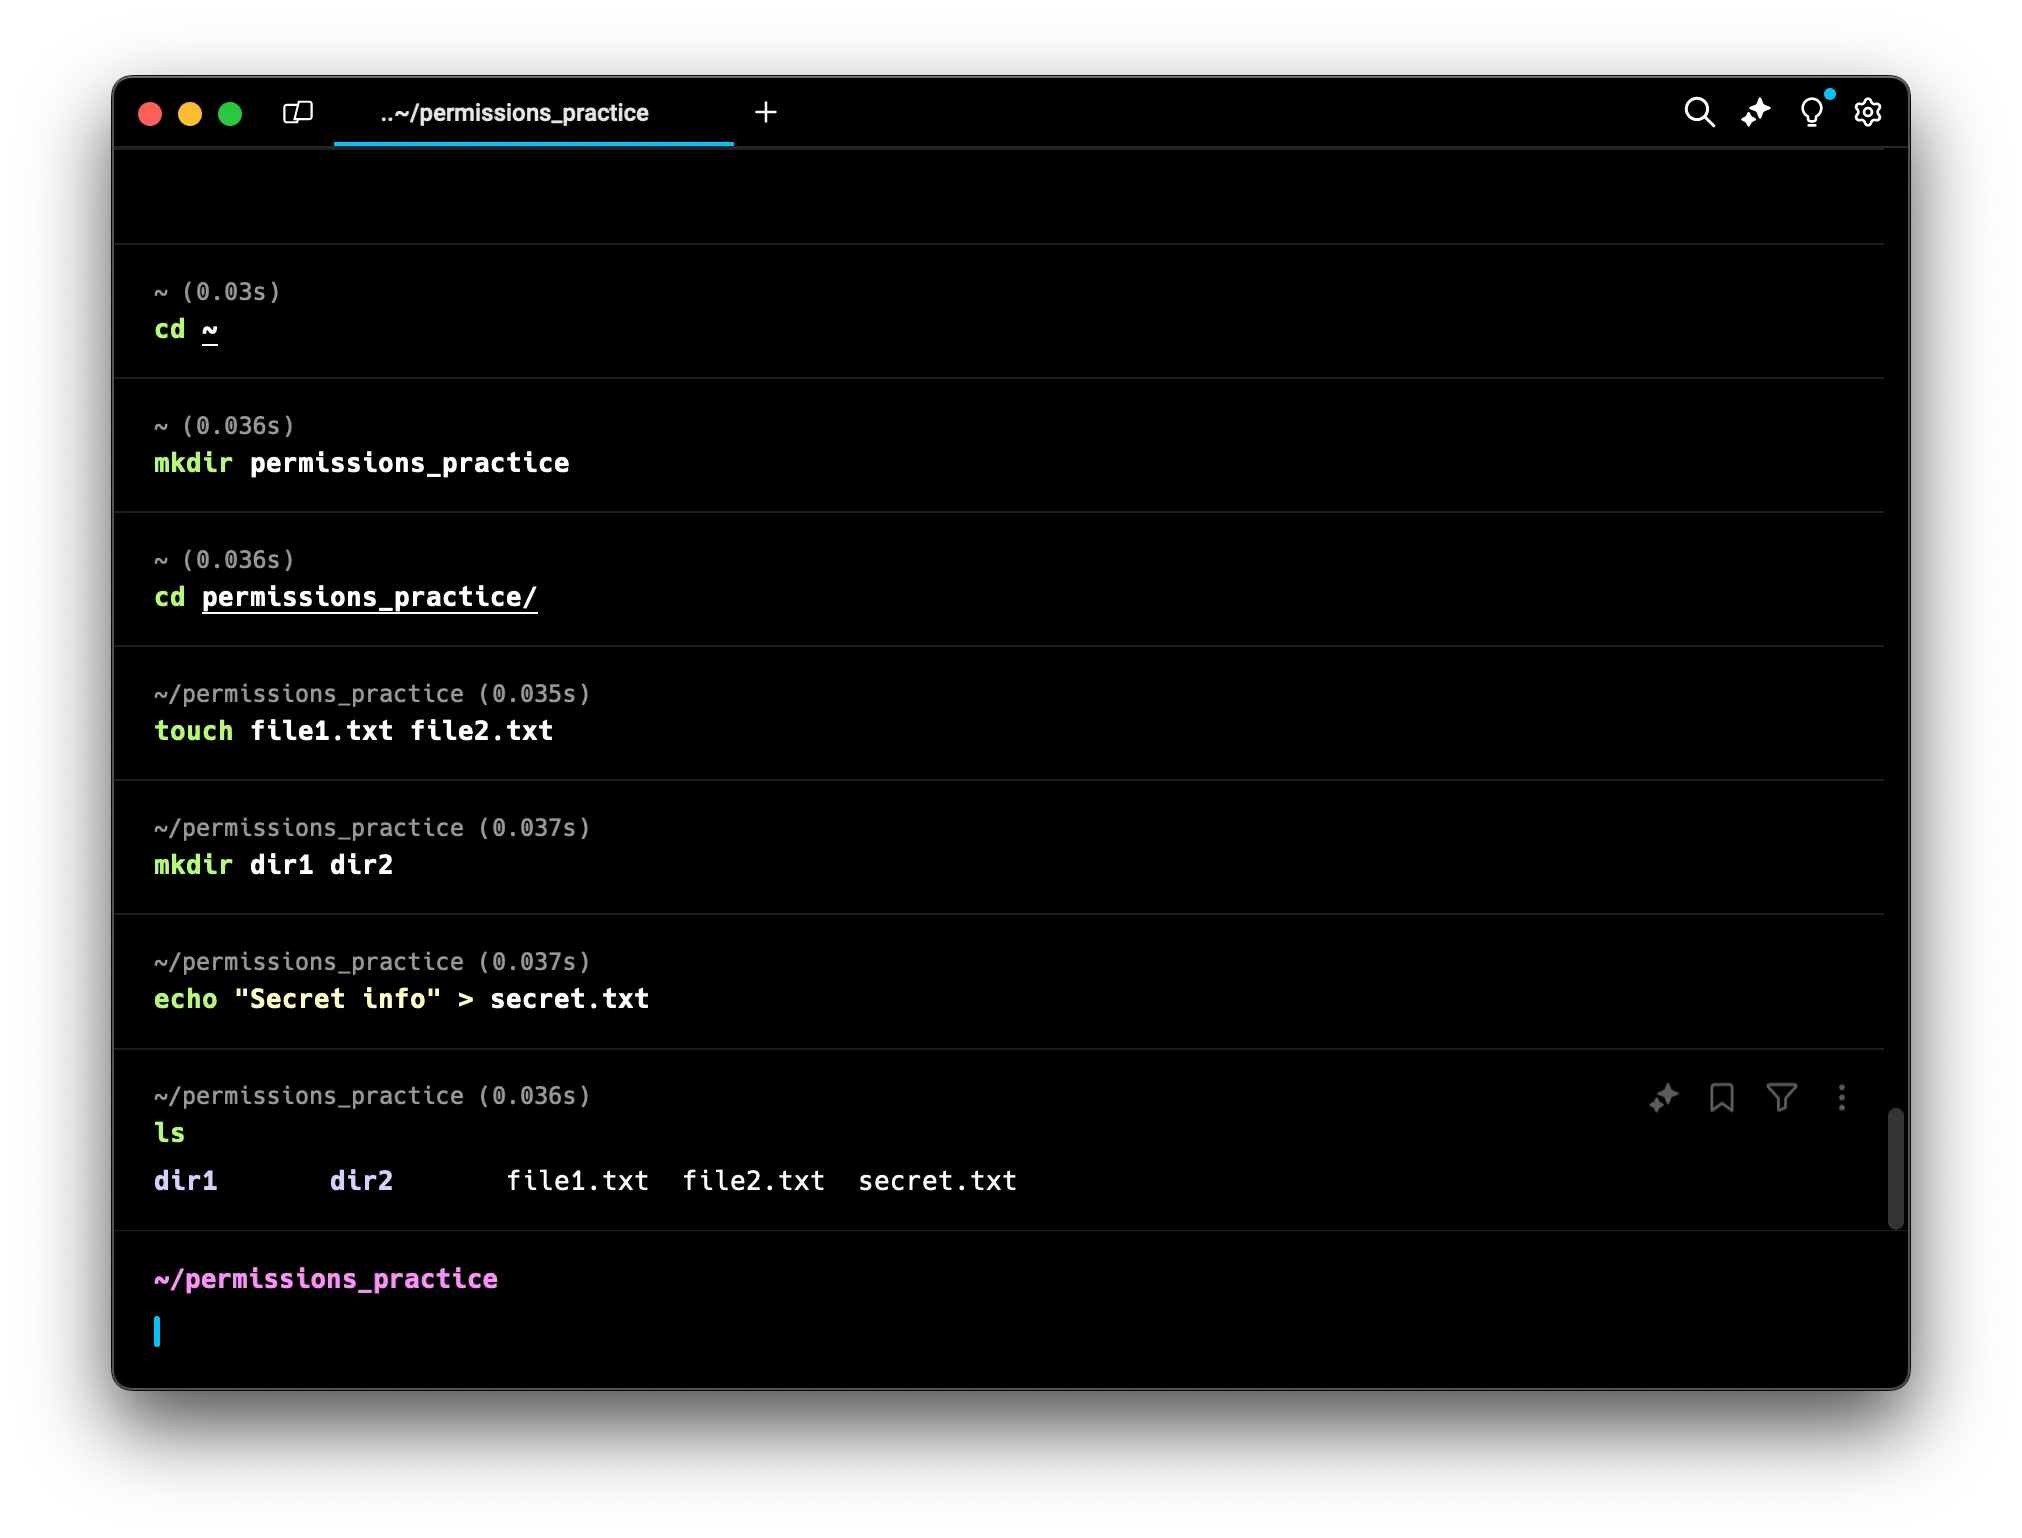 Now we have a workspace with two empty files (file1.txt and file2.txt), two empty directories (dir1 and dir2), and a file containing some “secret” information (secret.txt). We’ll use these to practice viewing and changing permissions throughout this tutorial.
Understanding Linux File Permissions
Before we dive into specific commands, it’s crucial to understand the fundamental concepts of Linux file permissions. This foundation will make it easier to grasp the practical aspects we’ll cover later.
Users, Groups, and Others
In Linux, file permissions are based on three types of users:
- Owner: The user who owns the file or directory.
- Group: A set of users who share the same permissions for the file or directory.
- Others: All other users who are not the owner and not in the group.
This system allows for flexible and granular control over who can do what with each file and directory.
Read, Write, and Execute Permissions
For each of these user types (owner, group, and others), Linux defines three basic permission types:
-
Read (r):
- For files: Allows viewing the contents of the file.
- For directories: Allows listing the contents of the directory.
-
Write (w):
- For files: Allows modifying the contents of the file.
- For directories: Allows adding, removing, and renaming files within the directory.
-
Execute (x):
- For files: Allows running the file as a program or script.
- For directories: Allows entering the directory and accessing its contents.
Numeric Representation of Permissions (Octal Notation)
Each permission type (read, write, execute) can be represented by a number:
- Read (r) = 4
- Write (w) = 2
- Execute (x) = 1
By adding these numbers, we can represent all possible permission combinations with a single digit:
- 7 (4+2+1) = read, write, and execute
- 6 (4+2) = read and write
- 5 (4+1) = read and execute
- 4 = read only
- 3 (2+1) = write and execute
- 2 = write only
- 1 = execute only
- 0 = no permissions
Symbolic Representation of Permissions
Permissions can also be represented symbolically:
rfor readwfor writexfor execute-for no permission
For example, rwxr-xr-x means:
- Owner has read, write, and execute permissions
- Group has read and execute permissions
- Others have read and execute permissions
Viewing File Permissions
Now that we understand the theory behind Linux permissions, our first practical step is to learn how to view these permissions. After all, before we can make any changes, we need to know what the current permissions are.
Using the ls -l Command
The most common way to view file permissions is using the ls command with the -l option:
ls -l
Let’s try this in our workspace:
ls -l
You should see output similar to this:
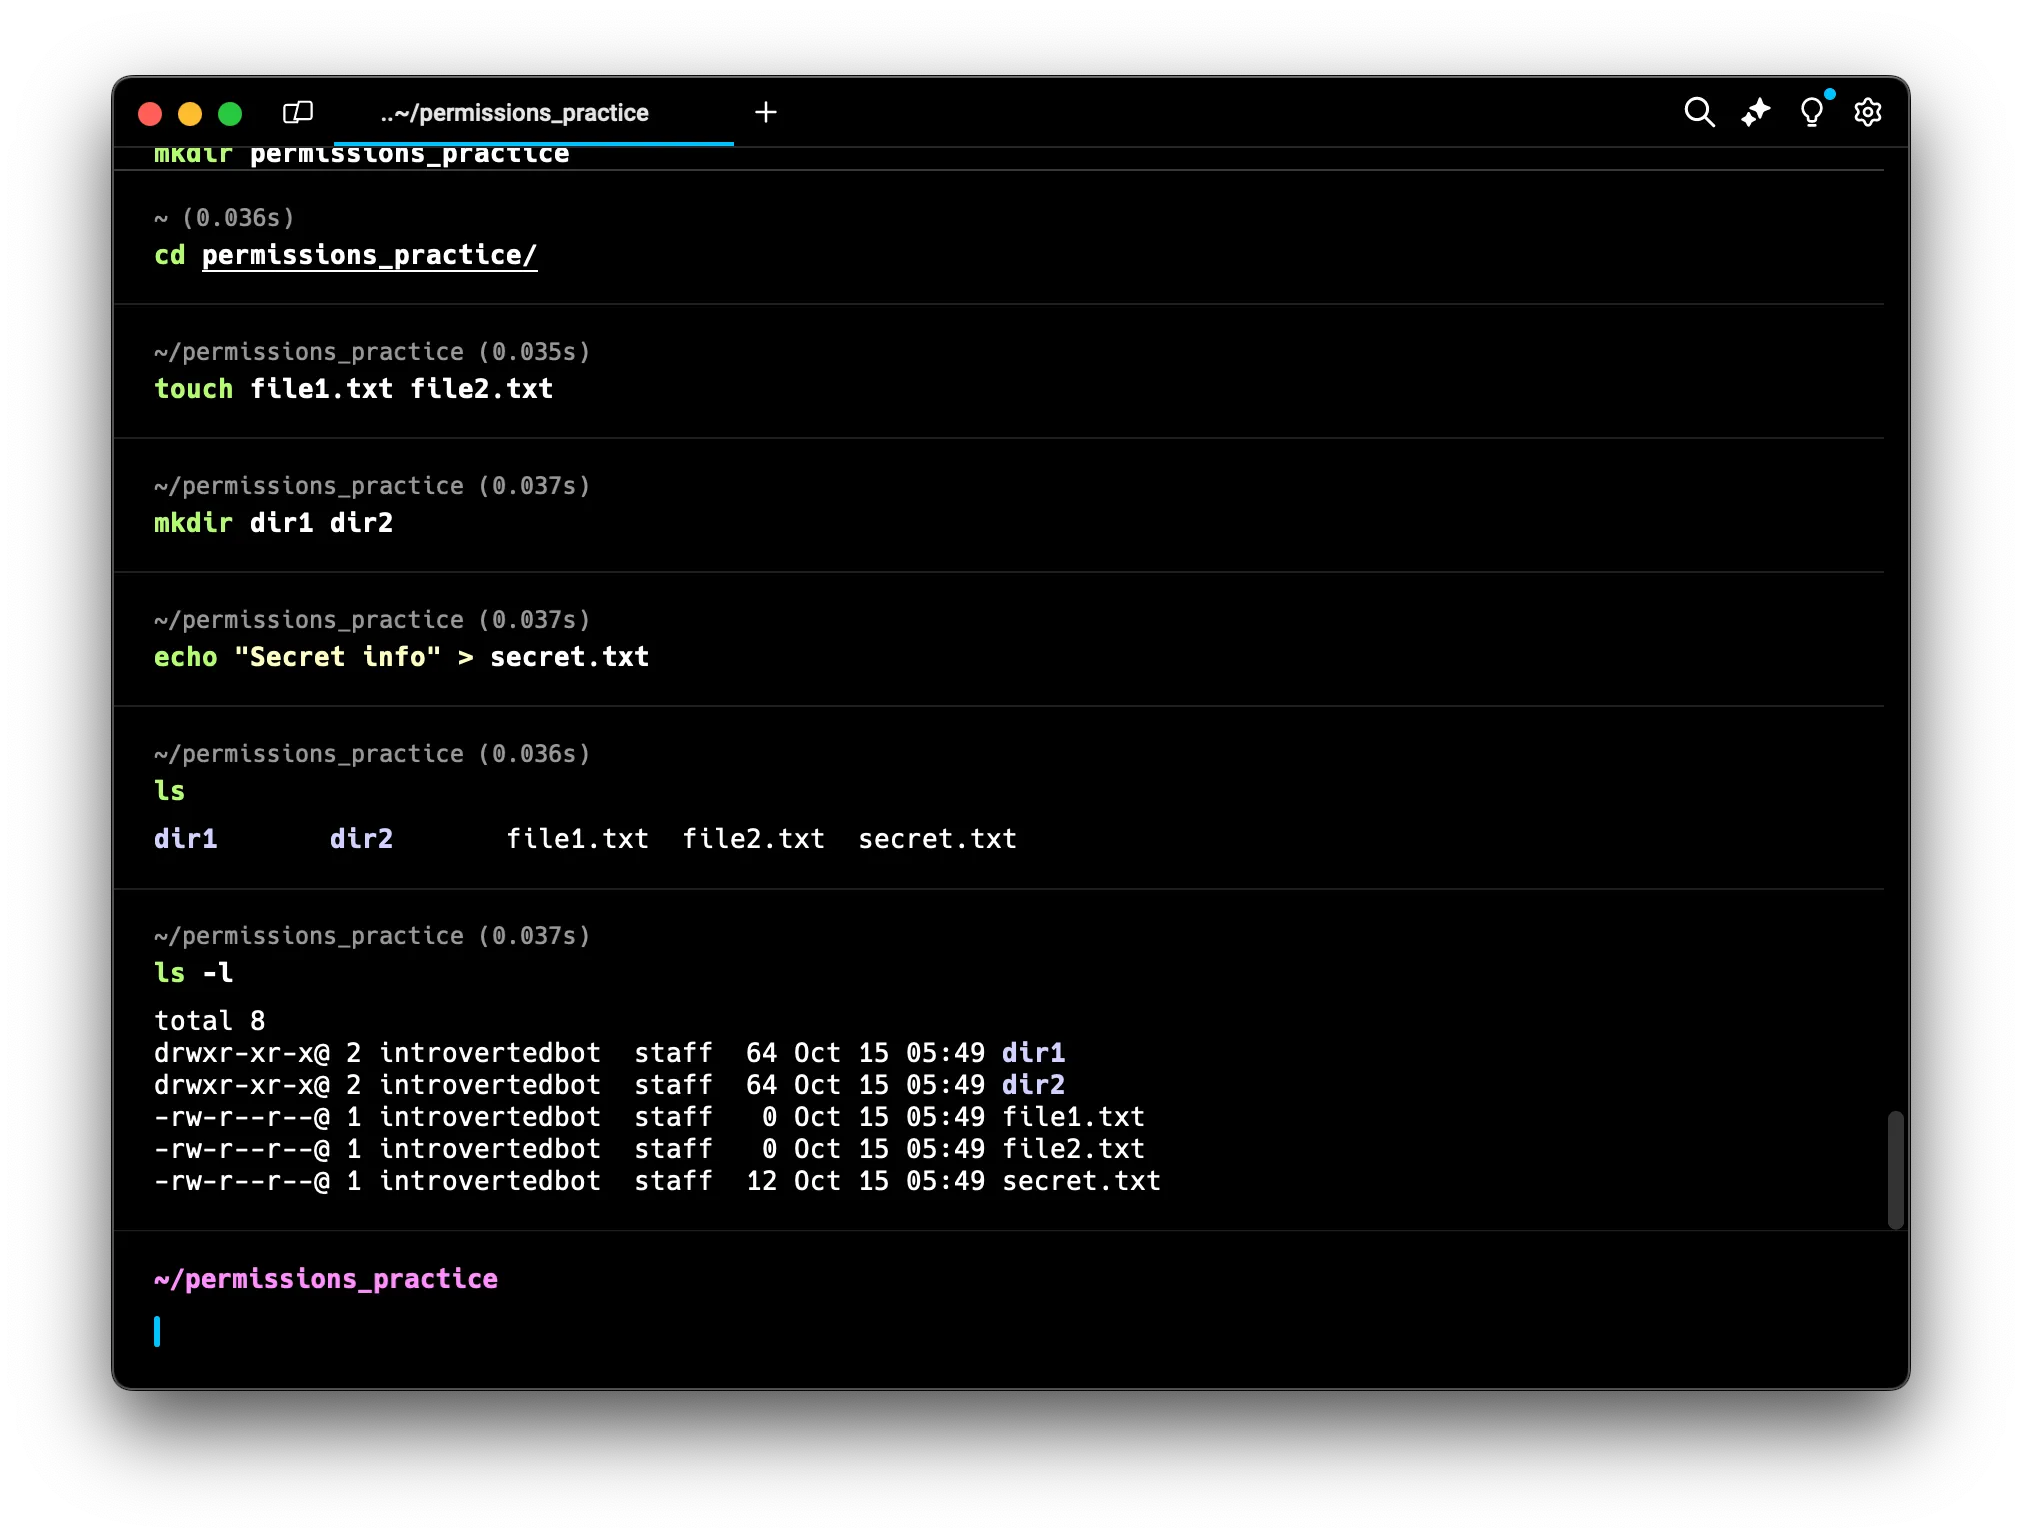
Interpreting the Permission String
Let’s break down the permission string -rw-rw-r--:
-
The first character indicates the file type:
-for regular filedfor directorylfor symbolic link
-
The next three characters (
rw-) show the owner’s permissions:r(read) is presentw(write) is present-means no execute permission
-
The next three (
rw-) show the group’s permissions:r(read) is presentw(write) is present-means no execute permission
-
The last three (
r--) show the permissions for others:r(read) is present-means no write permission-means no execute permission
Understanding Ownership Information
In the ls -l output, you’ll also see ownership information:
-rw-rw-r-- 1 introvertedbot staff 0 Oct 15 14:30 file1.txt
- The
introvertedbotis the owner of the file - The
staffis the group associated with the file
Changing File Permissions
Once we can view and interpret file permissions, the next logical step is learning how to change them. This is where the chmod command comes in.
The chmod Command
The chmod command is the primary tool for changing file permissions in Linux. We introduce it here because it’s the natural progression after learning how to view permissions.
The basic syntax of chmod is:
chmod [options] mode file
Using Numeric (Octal) Notation with chmod
We start with numeric notation because it’s a concise way to set all permissions at once. It’s often quicker for experienced users but can be less intuitive for beginners.
Let’s practice changing permissions on file1.txt:
chmod 755 file1.txt
ls -l file1.txt
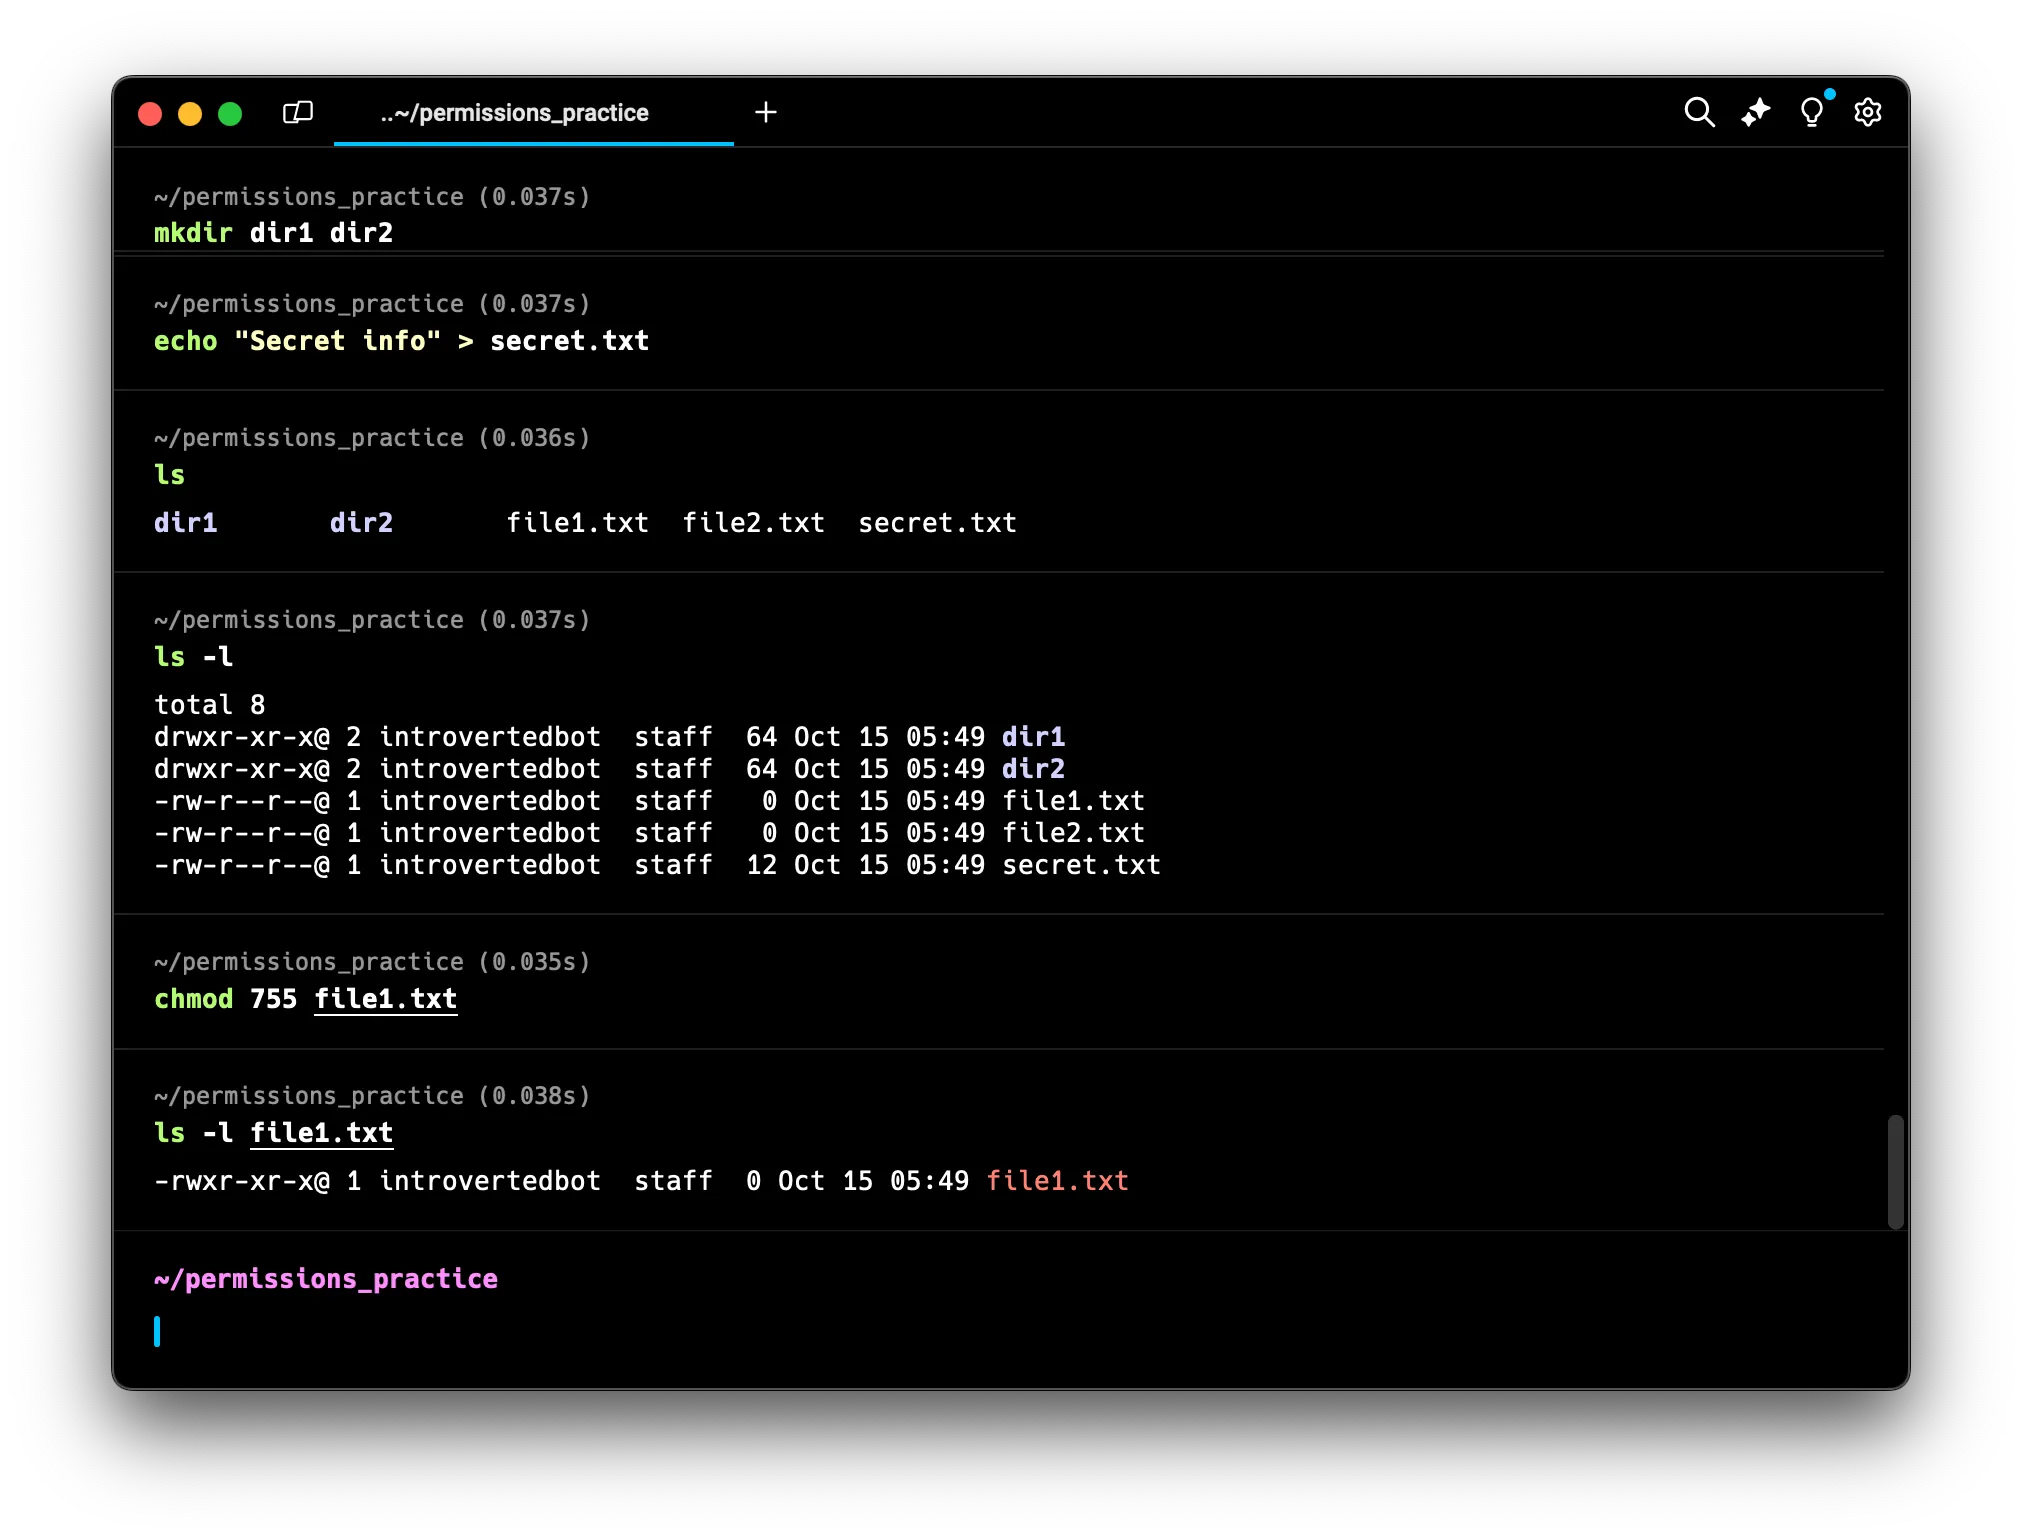 You should see the permissions change to:
 -rwxr-xr-x
This sets the permissions to:
- Owner: read, write, and execute (7)
rwx - Group: read and execute (5)
r-x - Others: read and execute (5)
r-x
Note: The first
-represents that its a file
Using Symbolic Notation with chmod
After numeric notation, we introduce symbolic notation. This method is more intuitive and allows for more granular changes. It’s particularly useful when you want to modify only specific permissions without affecting others.
Now, let’s use symbolic notation to remove write permission for others on file2.txt:
chmod o-w file2.txt
ls -l file2.txt
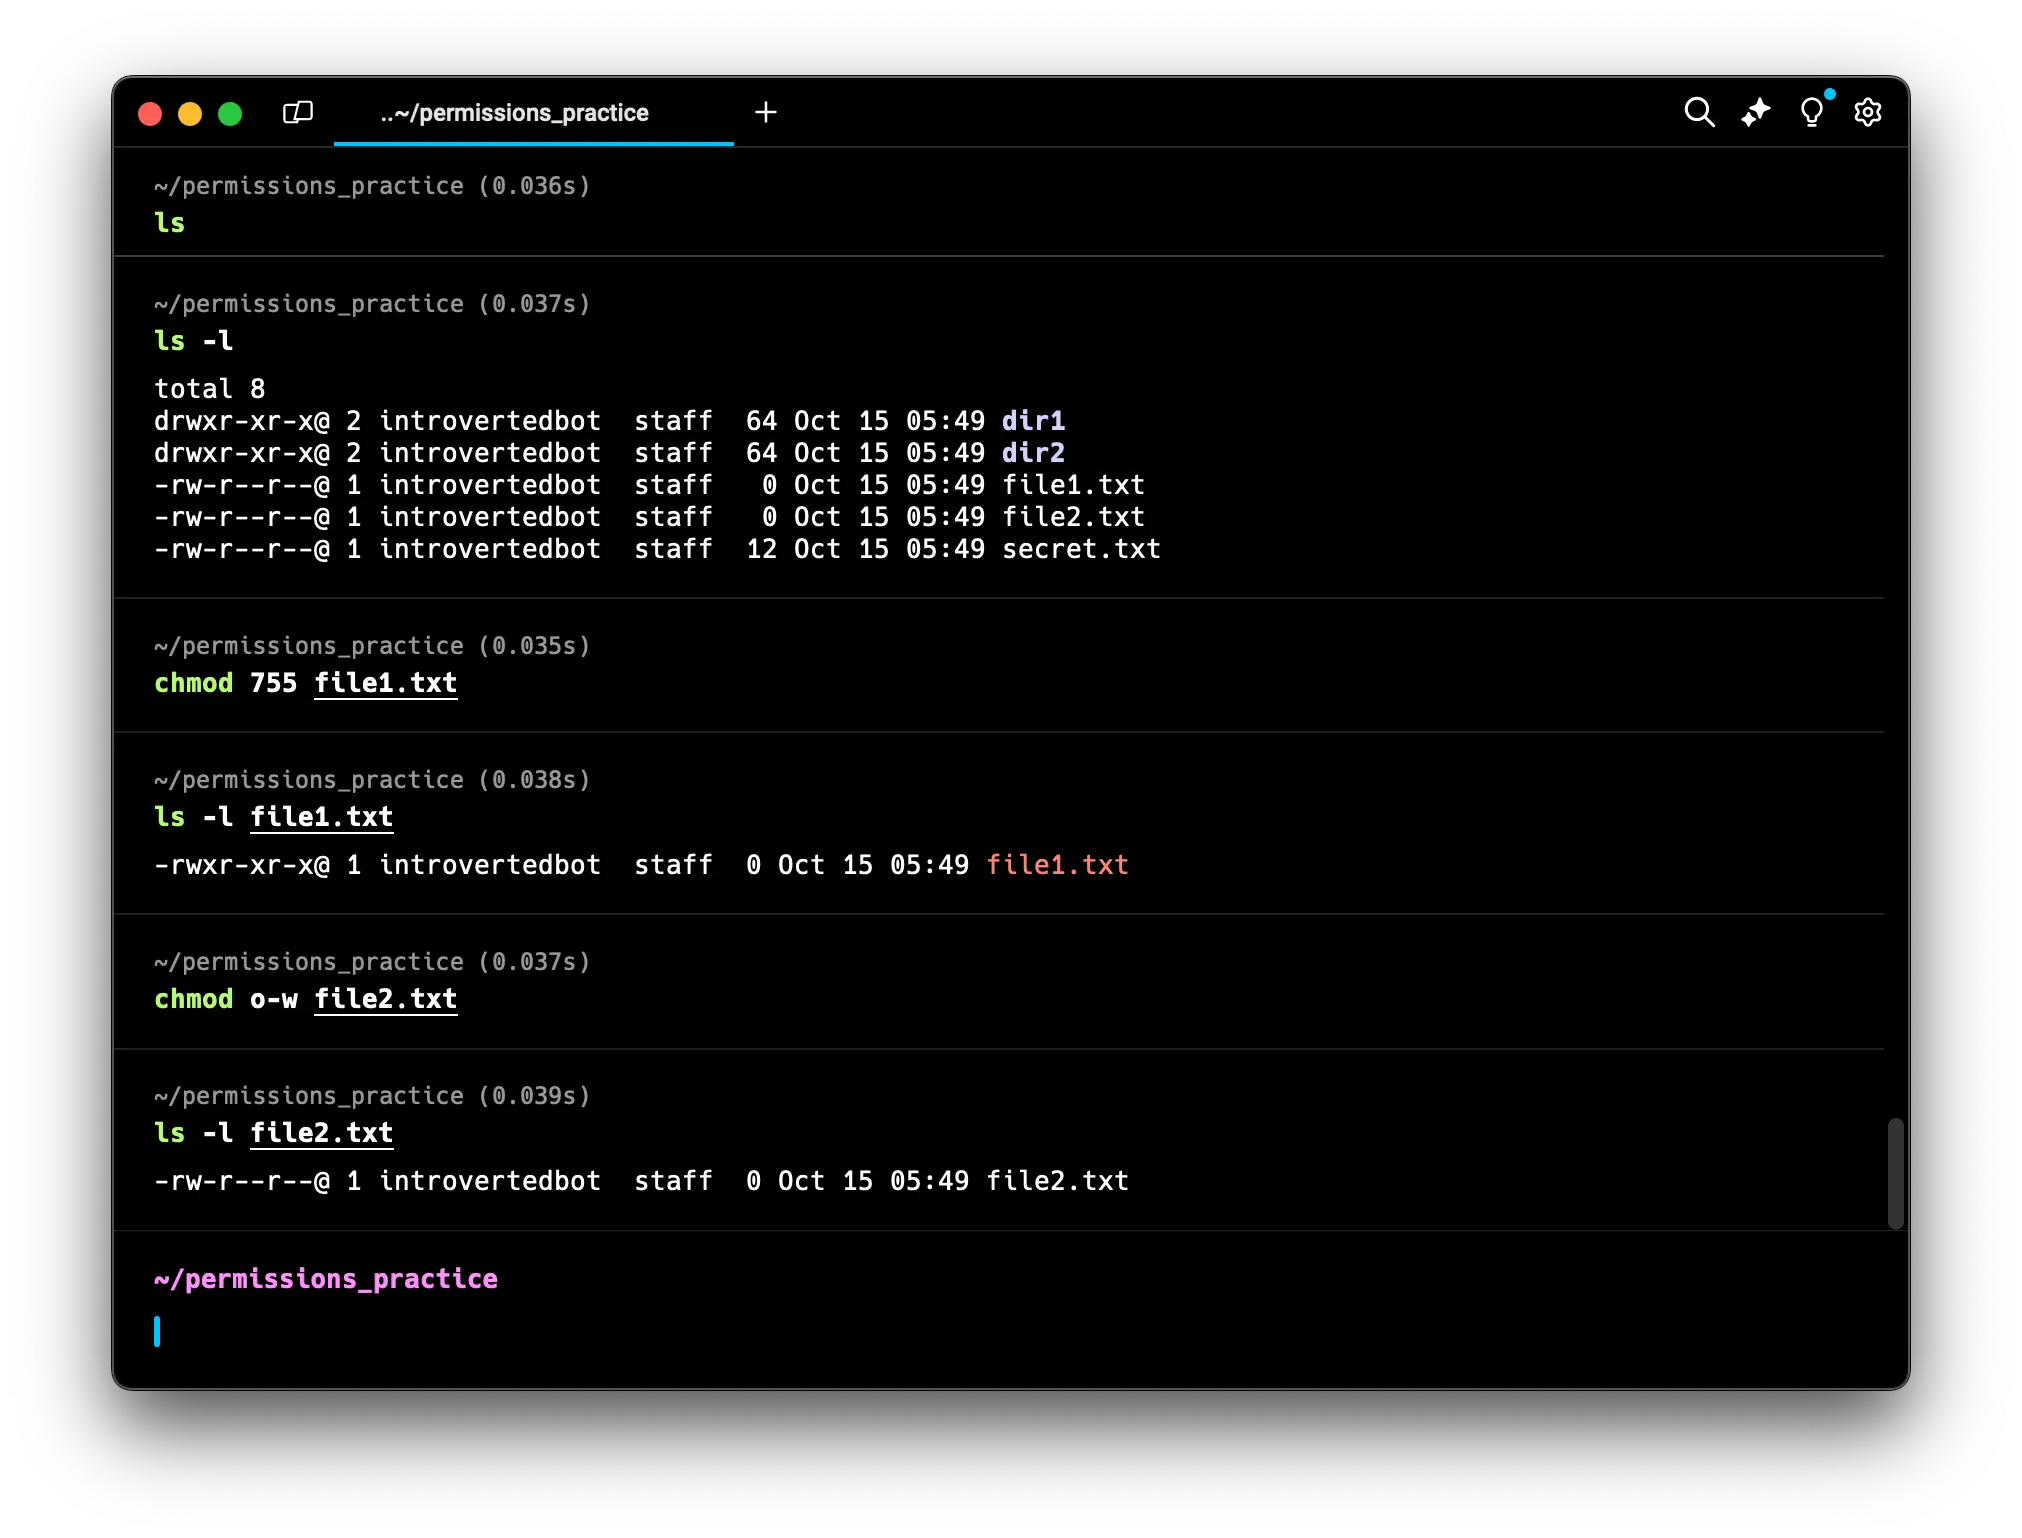 In this command, ‘o’ refers to “others” (not the owner or group), the minus sign means we’re removing a permission, and ‘w’ represents the write permission. If the initial permissions were
 -rw-rw-r--, the result would still be -rw-rw-r--. There’s no visible change because “others” already didn’t have write permission. This command ensures that “others” don’t have write permission, regardless of the initial state.
Here are some more examples:
chmod g+w example.txt: Add write permission for the group- Here, ‘g’ refers to the group, the plus sign means we’re adding a permission, and ‘w’ is the write permission. If the initial permissions were
-rw-r--r--, the result would be-rw-rw-r--. This gives write permission to the group, in addition to any permissions they already had.
- Here, ‘g’ refers to the group, the plus sign means we’re adding a permission, and ‘w’ is the write permission. If the initial permissions were
chmod o-r example.txt: Remove read permission for others- In this case, ‘o’ refers to “others”, the minus sign means we’re removing a permission, and ‘r’ is the read permission. If the initial permissions were
-rw-rw-r--, the result would be-rw-rw---. This removes the ability for “others” to read the file.
- In this case, ‘o’ refers to “others”, the minus sign means we’re removing a permission, and ‘r’ is the read permission. If the initial permissions were
chmod a+x example.txt: Add execute permission for all (owner, group, others)- The ‘a’ means “all” (equivalent to ugo for user, group, and others), the plus sign means we’re adding a permission, and ‘x’ is the execute permission. If the initial permissions were -rw-rw-r—, the result would be -rwxrwxr-x. This makes the file executable for all users.
When using symbolic notation, remember that ‘u’ refers to the owner (user), ‘g’ refers to the group, ‘o’ refers to others, and ‘a’ refers to all (owner, group, and others). The plus sign adds a permission, the minus sign removes a permission, and the equals sign sets the exact permissions.
Examples of Common Permission Changes
-
Make a script executable for everyone:
chmod a+x script.sh -
Allow group members to modify a file:
chmod g+w shared_doc.txt -
Remove all permissions for others:
chmod o-rwx sensitive_file.txt
Changing File Ownership
After mastering how to change permissions, the next logical concept to explore is changing file ownership. In many scenarios, adjusting ownership is necessary before or in conjunction with changing permissions.
Note: The following examples describe scenarios typically found in multi-user systems like servers. If you’re working on a personal computer, you might not have additional users or groups to work with. These examples are meant to illustrate the concepts, even if you can’t directly replicate them on your system.
The chown Command for Changing User Ownership
The chown command allows us to change the user ownership of a file, which is often the first step in reassigning responsibility for a file or directory.
The basic syntax is:
sudo chown new_owner file
For example, in a multi-user system:
sudo chown alice file1.txt
This would change the owner of file1.txt to the user alice.
The chgrp Command for Changing Group Ownership
While chown can change both user and group ownership, chgrp is specialized for changing group ownership only. It’s useful in scenarios where you want to maintain the current user ownership but adjust group access.
The basic syntax is:
sudo chgrp new_group file
For example, in a system with multiple groups:
sudo chgrp project_team dir1
This would change the group of dir1 to project_team.
Examples of Ownership Changes
-
Change both owner and group in one command:
sudo chown new_owner:new_group fileFor example:
sudo chown alice:project_team dir2This would change the owner to
aliceand the group toproject_teamfordir2. -
Recursively change ownership of a directory and its contents:
sudo chown -R new_owner:new_group directoryFor example:
sudo chown -R bob:marketing dir1- The
-Roption makes the change recursive - This would change the owner to
boband the group tomarketingfor dir1 and all its contents
- The
Understanding the Concepts
Even if you can’t practice these commands on your personal system, it’s important to understand their purpose:
-
chownis used to change the user who owns a file or directory. This user typically has full control over the file. -
chgrpchanges the group associated with a file or directory. This can be useful for collaborative projects where multiple users need similar access. -
Changing ownership is often done in conjunction with modifying permissions to ensure the right users or groups have appropriate access to files and directories.
-
In multi-user environments, proper management of file ownership and permissions is crucial for maintaining security and controlling access to sensitive data.
Practical Exercises
Now that we’ve learned about permissions and practiced some basic commands, let’s tackle some real-world scenarios using our workspace.
Scenario 1: Securing Sensitive Information
-
Check the current permissions of secret.txt:
ls -l secret.txt -
Change the permissions so that only you can read and write to the file:
chmod 600 secret.txt -
Verify the new permissions:
ls -l secret.txt
Scenario 2: Setting Up a Shared Project Directory
-
Create a new directory for a shared project:
mkdir shared_project -
Set the permissions so that:
- You have full access
- Members of the project_team group can read and write, but not delete files
- Others have no access
chmod 770 shared_project -
Set the SGID bit so new files inherit the directory’s group:
chmod g+s shared_project -
Verify the permissions:
ls -ld shared_project
Scenario 3: Creating an Executable Script
-
Create a simple shell script:
echo '#!/bin/bash' > script.sh echo 'echo "Hello, World!"' >> script.sh -
Try to execute the script:
./script.shYou should get a “Permission denied” error.
-
Add execute permission for the owner:
chmod u+x script.sh -
Try executing the script again:
./script.shIt should now print “Hello, World!”
-
Verify the new permissions:
ls -l script.shYou should see that the owner now has execute permission.
Scenario 4: Troubleshooting Permission Issues
-
Create a new file owned by root:
sudo touch root_file.txt -
Try to modify the file:
echo "test" > root_file.txtThis should fail due to lack of permissions.
-
Check the file’s permissions:
ls -l root_file.txt -
Change the ownership to your user:
sudo chown $USER root_file.txt -
Try modifying the file again:
echo "test" > root_file.txtThis should now succeed.
-
Verify the change:
cat root_file.txt
These exercises demonstrate common scenarios you might encounter when working with Linux permissions. They cover securing sensitive files, setting up shared directories, creating executable scripts, and troubleshooting permission-related issues.
Conclusion
Congratulations! You’ve now mastered the essentials of Linux file permissions. We’ve covered:
- The concept of users, groups, and permissions
- Viewing and interpreting file permissions
- Changing permissions and ownership
- Practical scenarios and troubleshooting
Show Off Your New Permission Skills!
You’ve learned a lot about Linux file permissions! Why not put your new knowledge to the test and share your accomplishments?
- Complete the practical exercises in this article
- Take a screenshot of your terminal showing the commands you used and their results
- Post it on Twitter or LinkedIn
- Tag me (@introvertedbot on Twitter)
I’d love to see how you’re applying these concepts in real-world scenarios. Your example might just inspire another budding system administrator or developer!
Clean Up
Before we wrap up, let’s clean our workspace:
cd ~
rm -r permissions_practice
This removes the practice directory and all its contents. Always be cautious when using rm -r, especially with sudo privileges, as it can permanently delete files and directories.
Keep exploring the powerful world of Linux, and I’ll see you in the next lesson where we’ll dive into vim!